Thursday, October 24, 2013

Build-a-Boo embroidery designs

Available now, just in time for last minute Halloween projects...Build-a-Boo embroidery designs.
Build-a-Boo embroidery designs
Download the "B" for free. 
Purchase any two "O's". 
Stitch them out side by side and you've created your very own Boo.

There are 10 different "O's" to choose from. Visit CalicoCali.com  to see them all!

Wednesday, October 23, 2013

iPhone case makeover

iPhone case makeover

First step - removing the fabric backing from my case. I gently picked at one corner of the fabric with my finger nail and I was surprised at how easy the fabric came up. It was very easy to gently pull the fabric back and remove it from the plastic case.


I tried to use goo-gone to remove the dried glue from the plastic case, but it didn't work.  So I just left the dried glue on the case.

Next, using the old stained purple fabric as a template, I carefully traced the shape onto my new fabric. I had decided to fussy cut out one of the skulls from the Alexander Henry 'skullduggery' line of fabric.
Using permanent markers I colored in the rose next to the skull.

Before cutting out the fabric, I traced around the lines with Fray Check and let it dry.

 After I cut out the fabric I put more fray check along the fresh cut edges. I did not want to take any chances of having the fabric fray while working on it.

Originally, I thought I would mod podge the new fabric onto the case, but then I remembered that I had Nunn Design UV jewelry resin which I had not tried yet. I decided this would be the perfect project to test out the resin.

I followed the steps in the kit, first using the glue to adhere the fabric to my plastic iPhone case. I put the glue on using an old paint brush. I had a hard time getting the corners to stick down and actually put a bit of glue on top of the fabric (as if it were mod podge) in order to get it to stick. I let it dry overnight.

The 2nd step is a sealant, that only needs 20 minutes to dry. Again I used a paint brush to apply it, but I let it dry overnight.

The 3rd step is the UV gel. The gel was a bit smelly, I recommend doing this in an area with ventilation. I also wore latex gloves to protect my skin in case I got messy. Let's face it...I make lots of messes. The gel itself was very thick and a bit hard to apply. Then again, the gel that I had was two years old, so a newer bottle might spread more evenly. After applying the gel with a brush I put the case under my UV light. It "baked" for 20 minutes. When I took it out, it was slightly tacky. The instructions said it would continue to harden for the next two hours. I decided to let it sit overnight.

The next day it was hard and shiny and pretty. But I could see where I had applied the gel unevenly. So I did a second coat...again letting the case harden overnight.

The end results are great. The case looks cool, and it's unique. The gel isn't 100% even, but I'm okay with that. I think it turned out fantastic for my first attempt using UV gel resin.

The case has also been holding up well to normal every day use. It's been tossed in my purse, pants pockets, gym locker and even spent some time in an ice rink and it's just as shiny and new looking as the day I made it. Overall I love it the case and I'm impressed with the Nunn Design UV resin.  I can't wait to make more stuff with it.
Monday, October 7, 2013

Bye bye rubber duckies

A few weeks ago, I woke up on a Sunday morning turned to my husband and said..."Hey wanna go to the hardware store and buy a track light for the kitchen?" Now asking my husband to go to the hardware store, is like asking me to go to a quilt shop. I knew the answer was going to be yes.

One hour later we were on our way home with everything we needed to remodel our guest bathroom. But no kitchen track light.

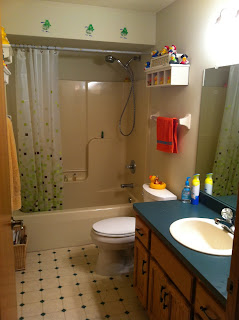
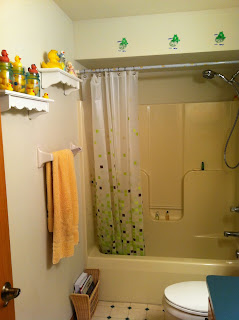
Yup..after 9 1/2 years in this house, it was decided that our ducky bathroom had to go, and we needed a more 'grown up' bathroom.

bathroom remodel - before
Bye bye duckies.

bathroom remodel

We wanted the 'new' bathroom to have that fancy hotel bathroom look to it. We started with paint. We used the same paint color as our master bathroom, so that the two rooms would have a similar feel to them.

bathroom remodel
What doesn't everyone put their toilet in the tub?
DH put down the same tile that he used in our camper. I love that tile. He also installed a new counter top and sink.
bathroom remodel

We painted the light fixture, mirror and trash can so they would match the oil rub bronze color that the master bathroom features. We also purchased a new faucet in that color. What can I say..we like brown.

bathroom remodel
The shower curtain is that kind that bowes out so that you have more room inside the shower.

bathroom remodel
Check out the 'jeweled' curtain rings!
I bought the accessories at Target, and I super love the small cake plate-like soap dish, where I plan on displaying one rubber ducky at a time. I might be having a hard time letting go of the duckies.

bathroom remodel
Hotel soap on the dish for when we have guests over.

bathroom remodel
Super fun Duckie on the soap dish for when we don't have guests.
Viola...new fancy bathroom. Oh and we did go back to get the kitchen track light too. Yahoo! I'm soo in love with our new bathroom, I can't believe we waited this long to remodel it.

Have a great week everyone!

-Kat  :)

About Me

My photo
I love all things crafty! Visit my website www.calicocali.com for tutorials, longarm quilting, svg designs, embroidery designs, nail decals, notions and more. Let’s Be Friends! Follow us on Facebook: www.facebook.com/calicocalidesigns/ Follow us on Instagram: www.instagram.com/calicocalidesigns/ Subscribe to our Youtube channel so that you don’t miss out on any of our fun tutorials! I hope you love our designs as much as I enjoy creating them. Happy Sewing Everyone!!! – Kat 🙂