The following is an actual converstion between my six year old nephew and myself:
Me: C, what did Santa bring you for Christmas?
Nephew: Coal
Me: Coal?
Nephew: Yes, Coal.
Me: What are you going to do with it? Are you going to use it to heat the house so it will be more energy efficient?
Nephew: I don't know...I haven't decided yet.
ha ha ha ha ha ha ha ha ha ha
I love this kid...he never ceases to amaze me.
Hope everyone had a wonderful Christmas - Happy Wednesday.
- Kat :)
Wednesday, December 26, 2012
Monday, December 24, 2012
HO HO HO
The embroidery club that I belong to has a holiday party each year where we exchange gifts. This year I made this super cute Santa tree topper from Happy Hollow Designs.
I have to admit that while the Santa tree toppers turned out cute, the directions were a bit confusing to me. I had to read them multiple times, and I really needed to rely on the photos to figure out how to piece Santa together.
Santa went together really fast, but the beard was challenging. The directions called for the Santa cone to be sewn up first, and for the beard to be hand stitched on. I'm not a fan of hand sewing, so I left the cone flat and machine sewed on the beard. Then I sewed the cone up, and only had to hand sew on a few strands of beard to cover up the seam.
I found the glasses at a local hobby store. I think they just complete him. The buttons I had in my stash.
While technically this Santa is supposed to be a tree topper, I think he makes an excellent centerpiece.
Merry Christmas...have a magical Holiday with your loved ones.
 | |
| Actually I made two of them because I wanted one for my self. |
I have to admit that while the Santa tree toppers turned out cute, the directions were a bit confusing to me. I had to read them multiple times, and I really needed to rely on the photos to figure out how to piece Santa together.
 |
| A girls gotta have hot fix crystals!!! |
Santa went together really fast, but the beard was challenging. The directions called for the Santa cone to be sewn up first, and for the beard to be hand stitched on. I'm not a fan of hand sewing, so I left the cone flat and machine sewed on the beard. Then I sewed the cone up, and only had to hand sew on a few strands of beard to cover up the seam.
I found the glasses at a local hobby store. I think they just complete him. The buttons I had in my stash.
While technically this Santa is supposed to be a tree topper, I think he makes an excellent centerpiece.
Merry Christmas...have a magical Holiday with your loved ones.
Sunday, December 16, 2012
Fun with Zippers
I've been sick with bronchitis for a few weeks, but I finally snuck down into my studio and had some fun with Zippers!!
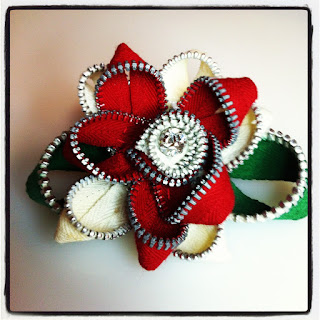
I love the look of zipper flowers, so I made this poinsettia for my MIL. I loved it so much that I made a few more for gifts.
If you are going to make zipper flowers, I highly recommend the Whimsy Pinwheel tool from Kari Me Away. You put pins through the holes in the tool, and then wrap the zipper around the pins. It's soo much easier than trying to hold the zipper with one hand, while twisting with the other. This tool free's up both hands.
I also made these adorable zipper hearts for two teenage girls in my extended family. I put them on corded necklaces and mailed them out as a surprise. Both girls loved them.
Of course I also made one for myself.
Happy Sewing!!
- Kat :)
Subscribe to:
Comments (Atom)
About Me

- Calico Cali Designs
- I love all things crafty! Visit my website www.calicocali.com for tutorials, longarm quilting, svg designs, embroidery designs, nail decals, notions and more. Let’s Be Friends! Follow us on Facebook: www.facebook.com/calicocalidesigns/ Follow us on Instagram: www.instagram.com/calicocalidesigns/ Subscribe to our Youtube channel so that you don’t miss out on any of our fun tutorials! I hope you love our designs as much as I enjoy creating them. Happy Sewing Everyone!!! – Kat 🙂


