Wednesday, August 22, 2012

WIP Wednesday - dissapearing 9 patch border

This week I'm working on a border row for my niece's quilt. The size of the finished quilt on the pattern is not big enough for her twin bed. I'm too lazy to do 'quilt math' so I've decided to just keep adding borders until the quilt drapes nicely over her bed. And since the quilting police don't live in my neighborhood, they'll be none the wiser.

I don't want each border to be solid fabric, so for this particular border I'm using the disappearing 9 patch technique...and I'm LOVING how easy it is! I looks like I spent lots of time cutting and piecing when in reality I got all the blocks sewn and cut on Sat afternoon.

Currently, I'm working on squaring up the blocks.  I spayed all the blocks with Best Press and pressed them with my new iron. I think the Best Press really helps to make the blocks flat and 'crisp'. (I'll do a review on Best Press later.)
press quilt blocks

To square them up I'm using my Shape Cut Plus ruler by June Tailor. The ruler has groove marks every 1/2 inch (you slide your rotary cutter in the groove to cut) and guide lines every inch.

I like using this ruler because the weight of the ruler keeps my block in place while I make the cuts, ensuring that the fabric doesn't slip. Fabric that stays in place = perfectly trimmed blocks.

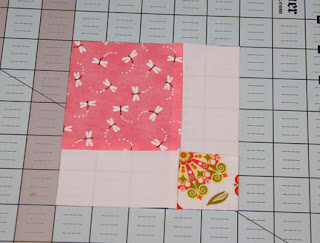
To use this ruler for squaring blocks I place the ruler on top of my fabric and align the stitched seam with the horizontal guide line on the ruler...then center the block (left and right).
quilt block

Using my rotary cutter I trim off the extra fabric on the left and right sides. (I'm cutting these blocks down so that they are 5 inches square). 
quilt block
quilt block

This is what the block looks like after making the first two cuts.
quilt block

Next, I flip the block around and repeat the same process on the top and bottom of the block.
quilt block


When I'm done cutting I'm left with a perfectly square quilt block.
quilt block

The whole process takes less than a minute per block...which is wonderful when you have a giant pile of blocks to square up.

Next up...stitching them all together. We'll see how far I get with that before next week's post.
quilt blocks
My finished squared blocks...along with my pile of trimmed pieces.
 Happy stitching everyone!
- Kat  :)


Monday, August 20, 2012

My first 5K


A few weeks ago, I participated in my very first 5K. I ran the Brewers 5K Famous Sausages Run/Walk.  The entry fee supports the Brewers Community Foundation.

The Famous Sausages (they are mascots for the Brewers) start the race off.  And they ran the entire thing! It was blast to look around while running and see them with in the crowd.

The first 1/4 mile was very clustered as everyone was getting their pace down. Even though it was crowded I thought it was soo cool to be surrounded by that many runners at one time. I took my headphones out and just listened to the sound of footsteps on the pavement. It made me smile.

The race course weaved through the parking lot of Miller Park and after mile #2 there was a band of sailors in their dress whites, playing music! They also waved and called out encouragements. Right after the band we got to run through the service tunnels of the park and onto the field! We ran around the warning track (on the outside of the field) and back into the tunnels and then excited on the other side of the stadium.

The next part of the race wound us back through the parking lot and over to the finish line. I passed the bratwurst sausage in the last 1/2 mile. Again, it made me smile.

I did pretty well for my first 5K...I figured it would take me 32 minutes and I finished in just under that.  Here are my stats:
Out of 4000 people I came in 1287
Out of the 540 people in my age division I came in 216
My official time 31:46:36
My official pace 10:14

This race was a lot of fun and very well organized. Fans lined up along the route and were cheering us on.  Other runners that had finished before me were standing at the finish line shouting out words of encouragements.  Before and after the race the Sausages and Bernie Brewer (the main mascot for the Brewers) hung out with the runners and there were plenty of opportunities for photo ops. 

I had so much fun that I can't wait to sign up for next year's race!

Wednesday, August 15, 2012

WIP Wednesday - Spider wall hanging


This week's WIP Wedneday features a finished quilt!! Wooo HOOO! A completed project!

A few months ago (okay, maybe it was more like a year ago) I picked up the pattern "Eeek!" by Patch Abilities, Inc. along with the cutest spider quilt hanger (more on him below).

'Eeek!" is an applique pattern (my favorite) and the directions were very easy to follow. Of course I changed it up a bit so my quilt would be unique.

I opted to skip the word "eeek" and instead cut out a ghost using my Sizzix and fused him to the bottom right corner of the quilt. I decided to do raw edge applique to add texture to the quilt. I also off set my spiders and placed them at an angle instead of in a straight column.
Finished wall hanging!!!!!

I used Chenille by the inch for the spiders' legs...which made them super fuzzy (side note...the chennile fuzz gets everywhere when you are fluffing it...be warned).  Hot fix crystals = perfect eyes.
Fuzzy wuzzy legs

Hot fix crystal eyes
Lastly, when I quilted it...I quilted the spider web in only the top left corner. I actually made two of these. One of them went to my Mom who loves Halloween as much as I do. I quilted Mom's first and I used metallic silver thread for the web. I love love the look of it...but using the metallic thread with free motion quilting proved to be more of a challenge than I wanted/had time for. 
Metallic thread
So when it came time to quilt mine, I just used regular thread. I was super excited when I found the spider quilt hanger in an LQS. I think he 'completes' the quilt. 
Adorable spider
I love the way this quilt came out..and I can't wait for Halloween so I can display it!


-Hugs,
Kat  :)

Wednesday, August 8, 2012

WIP Wednesday

People always ask me "What project are you working on now?" or "What are you sewing this week?". So I've decided to participate in WIP Wednesday!  (Work In Progress Wednesday).

Each week I'll do a quick post letting everyone know the status of my current project. I'm also hoping that this will motivate me to finish some projects more quickly.

This week I'm working on my niece's quilt. It's coming along nicely but I haven't had as much time to work on it as I had anticipated. Somehow my summer just filled up. Where does the time go?  Hmmm maybe I should spend less nights reading on my kindle and more nights sewing  ;)


 I think I'll ad two more borders, and then the top should be complete. I'm looking forward to piecing the back, and I've already been thinking about how I want to quilt it.  Fun Fun Fun!!!!!

- Hugs, 
Kat :)


About Me

My photo
I love all things crafty! Visit my website www.calicocali.com for tutorials, longarm quilting, svg designs, embroidery designs, nail decals, notions and more. Let’s Be Friends! Follow us on Facebook: www.facebook.com/calicocalidesigns/ Follow us on Instagram: www.instagram.com/calicocalidesigns/ Subscribe to our Youtube channel so that you don’t miss out on any of our fun tutorials! I hope you love our designs as much as I enjoy creating them. Happy Sewing Everyone!!! – Kat 🙂