Tuesday, June 29, 2010

Sewing Room face lift - part 2

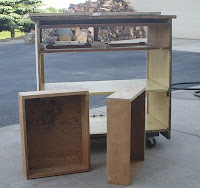
As part of the face lift to my sewing room, I'm refinishing a 1950's vintage cabinet. This particular cabinet was in my father in laws kitchen when he was a little boy. I love that it's been in the family this long...and I think that his mother would be happy that I've rescued it from the garage (where it was filled with nails and mice poo) and it will soon be lovingly used to store fun crafting and sewing supplies.
First step was stripping and sanding the cabinet.


Once I had all the old paint removed...I discovered this! An old butterfly decal had left a faded mark on the cabinet door. Like a hidden secret. But unfortunately the butterfly was not meant to stay..and it got covered up again just a quickly....my husband primed all the pieces for me.

 I love how he hung the cabinet doors from the garage so that he could paint them evenly with his sprayer.
Next step is paint!!!!

My favorite part of the cabinet (aside from the fun paint color I picked out) is the actual vintage hardware.  I'm very excited about it...and can't wait to put it back on the cabinet, and get the cabinet back into my sewing room!!!

I'll post more photos once the paint is completed and the cabinet gets put back together.

- Kat  :)
Thursday, June 17, 2010

Sewing Room Facelift - part one

I've waited a long time for this...my sewing room is finally getting a face lift!!!!
I've been wanting to replace my shelves with cabinets ever since I saw an ad for a cabinet company that showed cabinets in a sewing room. I was instantly hooked..I had to have cabinets! The one thing I really dislike is walking into my sewing room and seeing all the clutter on those shelves and getting stressed out about it.  So little by little the shelves are going away..and being replaced with cabinets!  Here is a view of the two bottom cabinets. I left a space in between them so that I can put my serger on the counter and still have a spot for my chair with out hitting my knees.  So far I love it and I can't wait to get my serger all set up and running.
I haven't decided what color counter top I want yet...and since our trailer is full of wood that needs to be chopped up...I wont be getting a counter top anytime soon. So in the meanwhile I'm using two of the shelves pushed together as a counter top. I'm actually surprised at how well they work. Maybe I'll forgo real counter tops for a while and use that $$ for more Fabric. A girl can never have too much fabric  :)

 Next step will be to hang the upper cabinets once the holes in the wall have been patched from where the shelves hung. I'll post more photos as they become available.
Happy Sewing - Kat  :)

Weekend Projects

2 weeks ago I spent the entire weekend sewing..it was fabulous.  First I made myself a new camera strap, out of girly fabric and even embroidered my name on it...hint hint hubs..it's my camera..stop changing all my settings  :)
Thanks to @priddycreations for the fab tutorial!!


Next I made myself a cute belt to wear around in Vegas..again I put my name on it..not that hubs would actually try to wear this one!!


And lastly I made myself a new purse! (One of my favorite things to do). I heart the elephant fabric and because I love the have my name on things...I also embroidered my name on it. I'm not egomaniac I swear!!


And that was the entire weekend...3 fun projects...3 great additions to my closet!  :)
Happy Sewing.
-Kat  :)

About Me

My photo
I love all things crafty! Visit my website www.calicocali.com for tutorials, longarm quilting, svg designs, embroidery designs, nail decals, notions and more. Let’s Be Friends! Follow us on Facebook: www.facebook.com/calicocalidesigns/ Follow us on Instagram: www.instagram.com/calicocalidesigns/ Subscribe to our Youtube channel so that you don’t miss out on any of our fun tutorials! I hope you love our designs as much as I enjoy creating them. Happy Sewing Everyone!!! – Kat 🙂